
One of the common elements of every single successful web project in history is thorough testing, whether manual or automated. Thankfully Drupal has a relatively painless out-of-the-box testing framework however it’s biggest flaw is that it aims to do end-to-end testing using sandboxed environments – which for most projects just doesn’t make sense. Better yet there’s no documentation on how to get out of the sandbox.
So … what’s the sandbox?
When a SimpleTest test is run in Drupal the following things happen:
- A random table prefix string is created.
- The database connection is cloned and a completely fresh and minimal version of Drupal is installed in the site default database using the random table prefix generated in step 1.
- Any modules that the current running test requires to be enabled are enabled.
- The test is run.
So what’s the problem? In the weak typed spaghetti code world of an average Drupal site full of alter hooks, preprocess functions, contributed modules and custom modules competing for the last word - testing a feature by isolating it and disregarding all other influences leads to coloured results. We want to know when something breaks on our particular site, in our particular use case.
The solution – extend SimpleTest!
To get started download this template module – it contains a super-generic testing module template that you can hack, change, destroy or make better.
The common test class
The common test class will be responsible for providing all the common functions used across our site tests as well as overriding the default SimpleTest class to remove database sandboxing. In the example module the abstract common class is defined within the site_testing.common.test file.
Database sandboxing takes place in two protected functions – setUp and tearDown. setUp is executed at the beginning of every single test runner within a test class and is responsible for initiating variables for the test whereas tearDown is executed at the end of every single test runner within a test class. Removing sandboxing massively increases performance as we no longer have to re-install Drupal at the beginning of every single test runner.
Write your first test
Included in the example module is a test file called site_testing.homepage.test that provides some easy tests to get you going. One thing to note in this example is you can never pass a user loaded using user_load through the drupalLogin system as the user object expects to have a raw password (pass_raw) value to type into the password textfield. Instead we’re creating a user within the setUp function and then destroying it in the tearDown to make sure the test user isn’t left over after we’ve finished our tests.
Assertions!
Assertions are checks performed during a test to declare whether a piece of functionality performed correctly or not. The results of your assertions are displayed in the test report once your tests are finished. A massive list of assertions are available at https://drupal.org/node/265828.
Lets run those tests
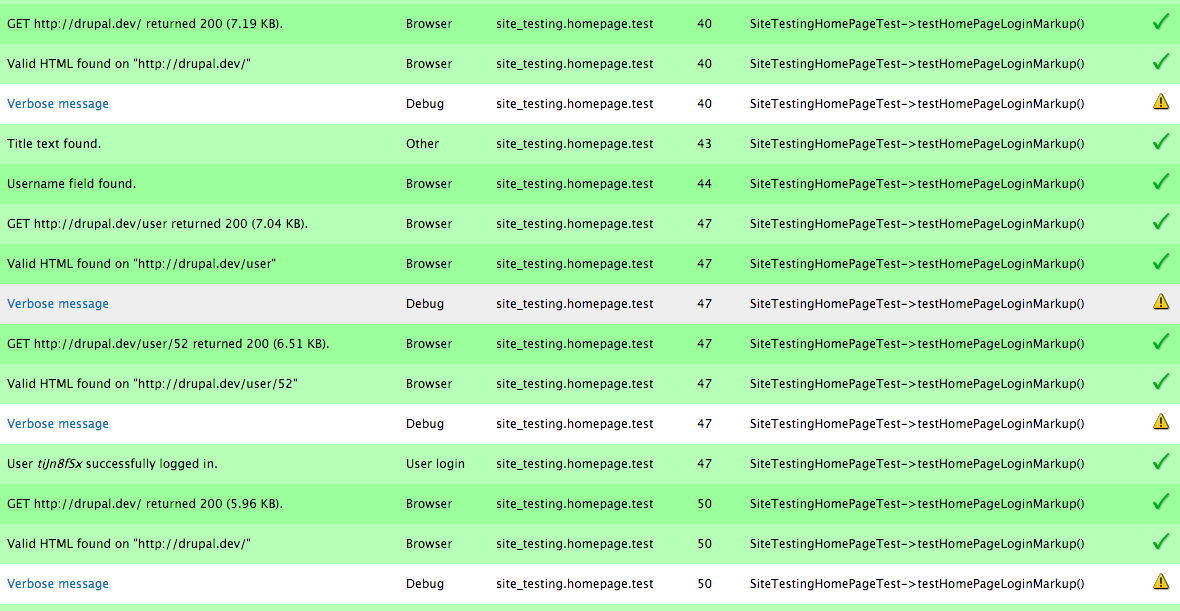
To run tests, enable your testing module and visit /admin/config/development/testing. Open the Site Testing section and select the tests you’d like to run and click ‘Run tests’. You should get a sexy report with a lot of green rows.
The bad and the ugly
When writing tests outside of the sandbox and on your database make sure not to do anything destructive or messy. Any users or nodes you create should be cleaned up in tearDown or just accepted as collateral damage to your development database (in which case you should never run those tests on staging or live versions of your site).
Please write tests
The zip file attached to this article contains everything you need to get started writing your own custom site-specific tests – and it’s painfully easy! It’s a worthwhile investment even for the smallest of sites and saves time and stress in the long run. Writing tests is therapeutic, which may sound crazy but it provides you as a developer with so much more confidence in your code and the use cases you’re covering and often allows you to find mistakes before code handover which makes you look like a more solid developer in the long run. The 10 – 20% investment in a basic automated testing routine will eliminate so much back-and-forth client-developer relation time and let you focus on what you actually enjoy, coding the hell out of your new project.